
No products in the cart.
How Much Side Clearance Does a Smith Machine Need? Measure the Working Space
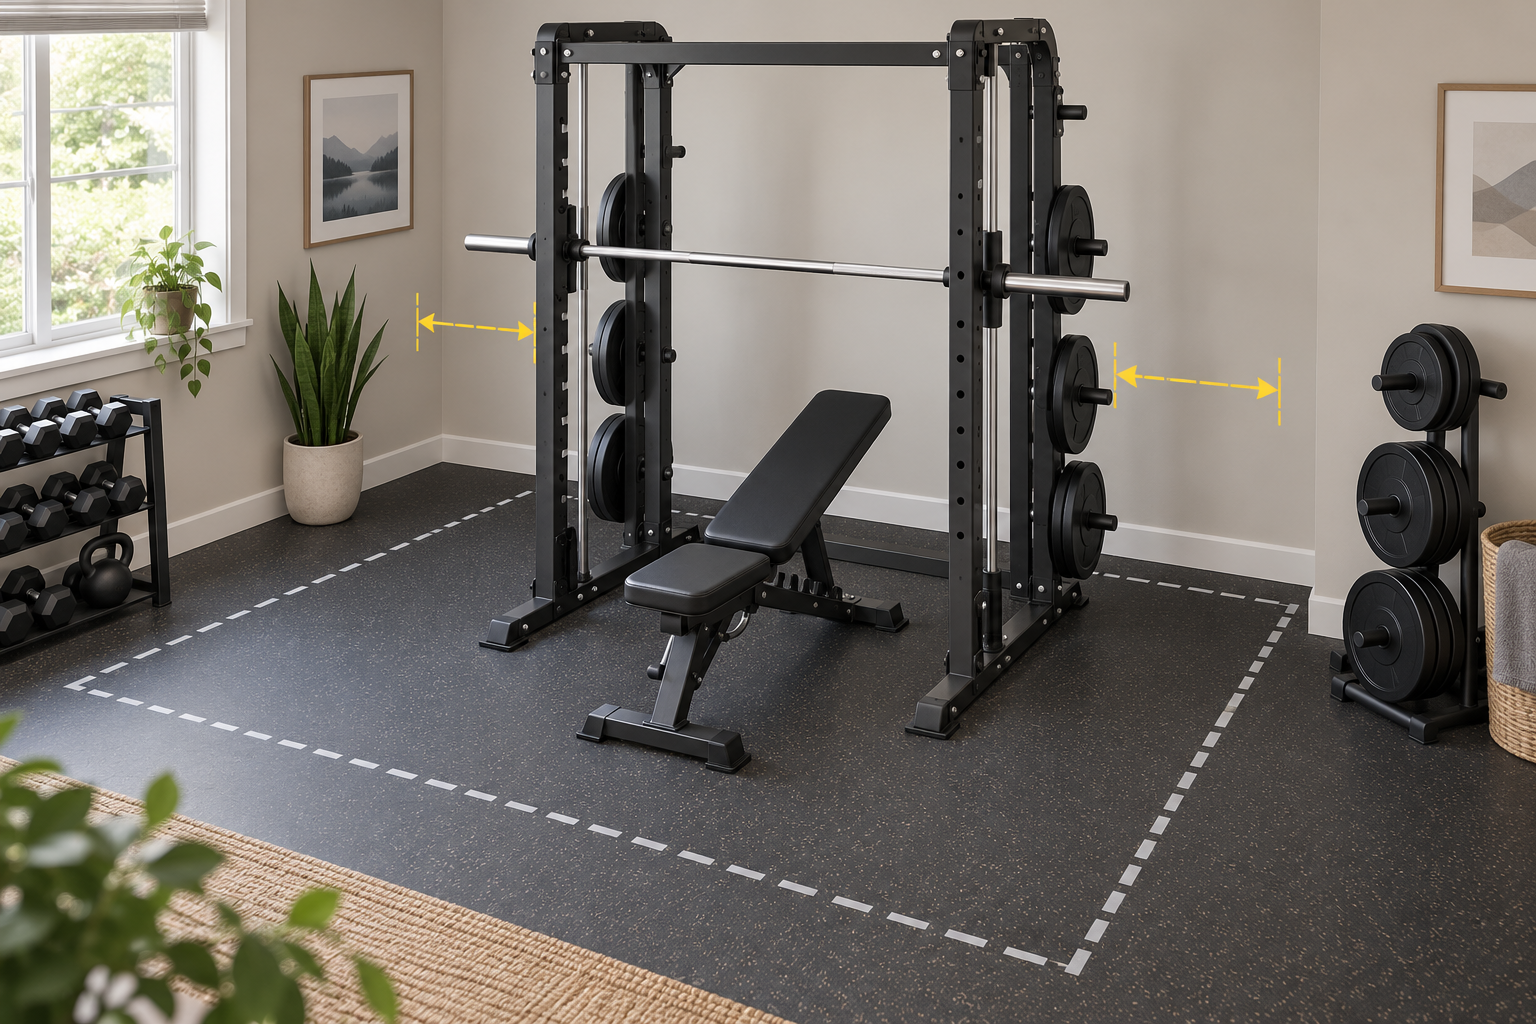
Cover illustration: AI-generated space-planning example, not a photograph of a WAXMAN product or a measured safety diagram.
Quick answer: There is no universal side-clearance number that fits every Smith machine, plate, bench, exercise, and room. Measure the machine’s actual outside width, then test the full path for loading plates, moving the bench, and getting in and out of each station. Keep the manufacturer’s assembly and use instructions in control; the floor footprint alone does not describe a usable training area.
This matters especially with a multi-station unit. A rack may fit between two walls while its plate sleeves, cable handles, bench, or a user’s movement collide with nearby furniture. Map those tasks before anchoring or assembling the equipment.
Start with the exact machine dimensions
Use the dimensions for the exact model and configuration you plan to buy. The WAXMAN product listing identifies its M4 Smith Machine as model WAX-SM-S02 and lists an assembled size of 87.2 inches high by 71 inches long by 48 inches wide. Treat those as the listed equipment dimensions, not as the total space needed to train. Attachments, plate loading, a bench, and the way the unit faces in your room all affect the practical layout.
Check the model label and the latest assembly documentation before relying on a web listing. A product page may not show every projection or operating clearance. If its diagram or manual gives a required space, use that requirement; if it does not, ask the manufacturer about the configuration and exercises you intend to use instead of assuming a generic clearance rule.
Mark the footprint, then test the working envelope
- Choose the final orientation. Mark the frame’s outside dimensions on the floor with painter’s tape. Include baseboards, posts, doors, and any wall-mounted items that could reduce the usable area.
- Add plate-loading access. Identify which sleeves or storage pegs you will use. Hold the actual plates and collars you own beside the marked frame and rehearse removing, carrying, and sliding them on without striking a wall or another station. Plate diameter and the length of a loading sleeve vary, so a catalog footprint cannot settle this check.
- Place the bench for each planned movement. Mark where the bench must sit for Smith exercises and where it moves for cable work. Pull it out and reposition it as you would during a normal session; do not count space that is blocked by a door, another machine, or stored weights.
- Check every attachment and cable path. Test the intended handle positions through their full range without crossing a walkway or contacting shelves, lights, or people. The product listing describes a Smith station, rack, pulleys, and attachments, but it does not publish a room-layout diagram for every exercise.
- Keep a clear route. Walk from the room entrance to the equipment and around the areas where plates are handled. Store unused weights on their designated supports when the equipment instructions allow it; do not leave plates or tools in the path.
Use a full-size mock-up before assembly
Painter’s tape outlines the base, but it does not show body movement or the path of a bench. Cardboard strips, a broom handle, or a temporary mock-up can help represent the machine’s outer frame and bar ends. Then stand where you expect to lift, move through the planned setup, and check whether you can load the plates with a controlled grip. This is a planning exercise, not proof that the equipment is safe to use or assembled correctly.
The American Council on Exercise advises arranging exercise stations with adequate space between equipment, participants, and foot traffic. That principle is useful at home, but it does not provide a model-specific number of inches for a Smith machine. Leave enough room for your real setup and household traffic, and avoid placing the station where another person must pass through the active lifting or plate-handling area.
When the room is tight
Try rotating the machine or moving movable storage before accepting a cramped layout. Recheck the bench positions and cable paths after each change. Do not remove guards, omit required hardware, modify the frame, or block an exit to make the footprint fit. If the floor outline fits but the full plate-loading and exercise checks do not, the room is not ready for that configuration.
Also account for delivery and assembly separately from workout clearance. A machine’s package dimensions and route through doors are different measurements from its assembled footprint. Confirm the current carton and delivery information with the seller, and do not begin assembly in a location where components cannot be safely handled.
Product details to verify
The WAXMAN listing checked October 15, 2026 identifies the M4 / WAX-SM-S02 as a combined Smith machine, rack, cable crossover, and pulley station. It lists 50 × 50 mm steel tubing, dimensions of 87.2 × 71 × 48 inches, and a whole-machine maximum capacity of 2,200 pounds. That rating is not a room-clearance measurement and does not establish the limit of every attachment. The page displayed $1,999.90 USD at the time checked; price and availability may change, so see the listing for current details. No stock status is stated here.

WAXMAN M4 Smith Machine with LAT-Pull and Cable Crossover — WAX-SM-S02
Listing details: 87.2 in H × 71 in L × 48 in W; 50 × 50 mm steel tubing; whole-machine maximum capacity listed as 2,200 lb. Confirm operating clearances and the intended attachment configuration with the current manual.
$1,999.90 USD (official listing checked October 15, 2026). Price and availability may change; see product page.
Bottom line: Map the outside footprint, then physically check plate handling, bench positions, attachment paths, and the walking route. If any of those tasks cannot be completed without obstruction, revise the layout or choose a different setup before assembling the machine.
Sources: WAXMAN official product listing (model, listed dimensions, features, and displayed price checked October 15, 2026); American Council on Exercise, ACE Personal Trainer Manual, Chapter 1 (equipment arrangement and hazard-free exercise area).
Leave a Reply