
No products in the cart.
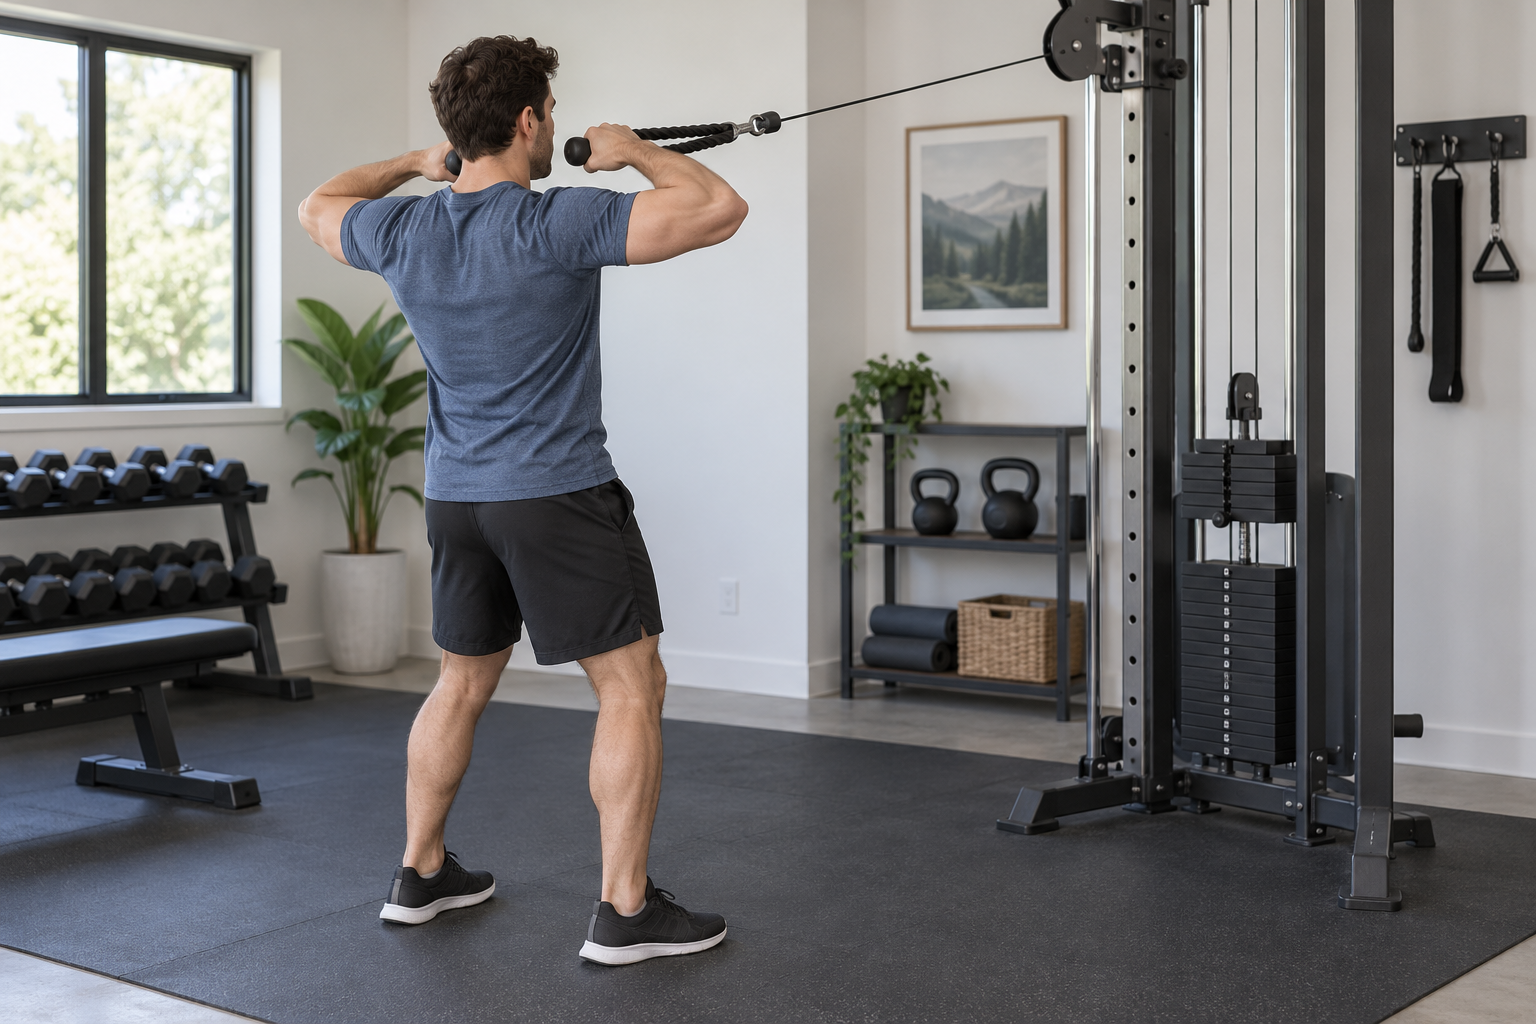
How to Set Up a Home Cable Face Pull Without Shrugging
Quick answer: Set a high cable so the rope starts around upper-chest or face height, use a very manageable load, and pull the rope toward your face while keeping your ribs stacked over your pelvis. Finish with your hands beside your head and elbows comfortably out, then return slowly. If the anchor shifts, the cable binds, or you feel sharp pain, stop and check the setup; this guide is general exercise information, not a substitute for coaching or medical advice.

Set the cable and your space before loading it
A face pull is a cable movement in which you draw a rope attachment toward your face. ACE lists the cable face pull among upper- and mid-back exercise options. That describes an exercise category, not a promise of a particular result or a prescription for every person. Start by checking the pulley manufacturer’s instructions and the anchor’s approval for the direction of force you plan to use.
Choose a high pulley position that lets the rope travel toward your upper chest or face without rubbing a sharp edge. Clear the path behind you and around the suspended plates. Stand far enough back that the cable is taut at the start, but not so far that you must lean or jerk to begin. If your system has a short travel path, a tall user or a low anchor may not allow a comfortable range; do not force the movement.
Choose the handle and a conservative starting load
A rope attachment is commonly used because its two ends can move independently near the finish. Confirm that the attachment and connector are intended for your system and locked in place before adding resistance. Begin with the least resistance that allows a smooth repetition. A plate-loaded home pulley may not show the same resistance at the handle as the plate’s printed weight, because the routing and pulley arrangement affect the force. Do not treat a product’s maximum-load claim as a suggested working weight.
The Waxman Fitness LAT and Lift Pulley System listing describes 70-inch and 90-inch cable options, a triceps rope, and pull-down and lift-up configurations. Match the selected cable and routing to its current instructions; the listing does not certify every anchor or room layout.
Use a controlled repetition
- Stand facing the pulley with feet stable and knees relaxed. Brace lightly so your torso does not rock as the cable pulls.
- Hold one end of the rope in each hand. Begin with arms extended but not forced into a painful stretch, shoulders comfortable, and wrists neutral.
- Pull the rope toward your face by bending your elbows. Let the hands separate as they approach the sides of your head; do not turn the movement into a backward lean.
- Pause only briefly in a position you can control. Keep the neck relaxed and avoid shrugging toward your ears.
- Return the hands forward slowly until the cable is taut again. Do not let the plates crash or let the cable snap you into the starting position.
Use a range of motion that feels smooth and pain-free. There is no single elbow angle or hand endpoint that suits every shoulder, mobility level, or cable layout. If the rope reaches your eyes, causes you to crane your neck, or makes your shoulders pinch, reduce the range or change the setup. If discomfort persists, stop and ask a qualified clinician or coach for individualized guidance.
Common setup problems and fixes
- You lean backward to move the load: Reduce resistance and move closer until you can remain upright. If that shortens the available range too much, this pulley arrangement may not suit the exercise.
- Your shoulders rise: Lower the resistance and slow the pull. Keep the movement comfortable; do not force the shoulders down if that causes pain.
- The rope or cable rubs the frame: Stop. Re-route only as the manual permits and inspect the cable path before resuming.
- The plates swing or the anchor moves: Stop the set and let everything settle. Recheck the connection and supporting structure; never stabilize a questionable anchor by adding body weight or improvising a strap.
- You feel sharp pain, numbness, or unusual weakness: End the exercise rather than trying to correct it by pulling harder.
How to progress
First make each repetition consistent: stable feet, no torso swing, comfortable shoulder position, and a controlled return. Add resistance only in small available steps when you can maintain those points. If the smallest plate jump makes form deteriorate, keep the lighter load or use another exercise approved by your trainer. General public-health guidance favors gradual progression, but it does not set a face-pull load or repetition target for you.
Inspect the cable, pulley, connector, rope, and anchor before use. Follow the exact product manual for installation, load limits, and wear criteria. A face pull is optional; it is not a treatment for shoulder pain and does not need to be included in every workout.
Sources: ACE, Back Exercises That Build Muscle; Physical Activity Guidelines for Americans, Second Edition; Waxman product listing. Prepared with Codex assistance; no personal product test or human editorial review is claimed.
Leave a Reply