
No products in the cart.
How to Set Up a One-Arm Dumbbell Row With a Flat Bench
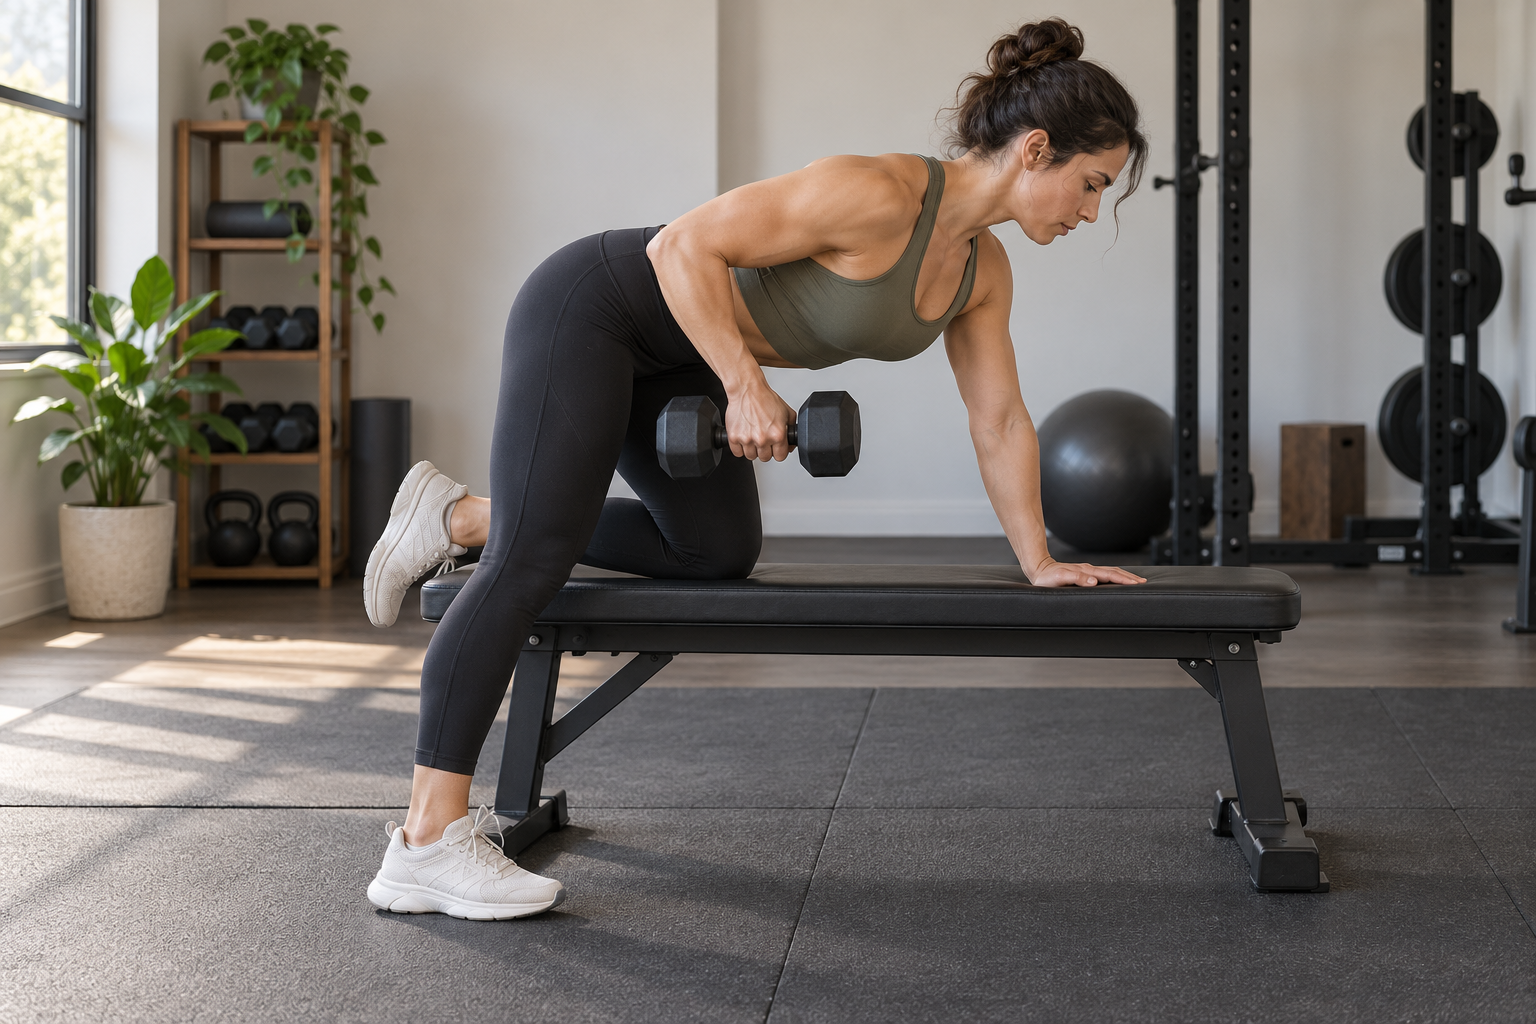
Quick answer: For a supported one-arm dumbbell row, place one hand and the same-side knee on a stable, level bench, with the other foot firmly on the floor. Keep your torso steady, let the dumbbell hang below your shoulder, and row only as far as you can without twisting. Start light enough to control the setup and every repetition. If the position causes pain or the bench shifts, stop and reset.
This guide covers the bench-supported row setup. It is different from choosing an incline-press angle or getting into a dumbbell chest-press position. The goal here is a stable base that lets you move one arm while keeping your trunk controlled.
Before you pick up a dumbbell
Put the bench on a level surface with clear space around it. Check that its frame and pad look intact, its feet contact the floor, and any adjustment mechanism is secured according to the exact bench manual. Do not use a bench that rocks, has damaged parts, or has a lock that will not engage. Keep the dumbbell you are not using and other loose items out of your step path.
Choose a load you can lift from the floor and place down without swinging or losing balance. There is no single starting weight that fits every person. If you are new to the movement, recovering from an injury, or unsure about your form, get guidance from a qualified fitness professional before loading it heavily.
Set up a supported one-arm row
- Choose the support side. Stand beside the bench with the dumbbell on the floor on the side of your free hand. For example, to row with your right arm, place your left hand and left knee on the bench, then plant your right foot on the floor.
- Find a steady stance. Place the supporting hand under or near the shoulder and the supporting knee under or near the hip, as your body size and comfort allow. Keep the planted foot far enough from the bench that you can balance without stretching or crowding the knee. Your stance should feel secure before you lift.
- Brace without forcing your back. Hinge at the hips and keep your head aligned with your torso. Use a comfortable, neutral back position; do not exaggerate an arch or round deliberately to reach the floor. Keep the shoulders and hips generally facing the floor instead of rotating toward the weight.
- Pick up the dumbbell carefully. With the free hand, grip the handle and lift the weight under control. Let the arm extend below the shoulder without letting the shoulder drop sharply or the trunk rotate. If you cannot reach or pick up the weight safely from your setup, reset the bench position or choose a lighter dumbbell.
- Row only within a controlled range. Pull the elbow back alongside your body while keeping the torso steady. Stop the upward motion when continuing would require a shrug, a twist, or a change in back position. Lower the dumbbell slowly to the starting point; avoid dropping it or bouncing at the bottom.
- Finish before switching sides. Lower the dumbbell to the floor with control before changing your hand, knee, or foot position. Recreate the stance for the other side and use the same cautious load. Do not carry a dumbbell while stepping around the bench if you can first set it down safely.
How to tell when the setup needs changing
If the bench slides, rocks, or shifts as you brace, stop and check the floor, feet, frame, and adjustment locks while unloaded. Do not try to steady a moving bench with one hand while holding a weight. If your supporting knee is uncomfortable, use a less painful stance only if it remains stable; padding may help with pressure but does not fix an unstable surface or an unsuitable bench height.
If you feel your torso twisting toward the dumbbell, reduce the load or shorten the range until you can keep control. A mirror can help you notice movement, but it does not replace instruction. If the exercise causes pain, stop. People with a chronic condition or specific safety concerns should check with a health professional before starting a strength program. Mayo Clinic advises controlled technique and stopping an exercise that causes pain; ACE’s exercise library describes the supported hand-and-knee position and a stable torso for this row.
What a bench listing can and cannot tell you
A product page may describe adjustment options, padding, dimensions, or other features, but those details do not prove that a bench fits every lifter or every exercise. Check the exact listing and manual for the model you own. Confirm the setup feels stable for your body and intended movement before adding load. A bench is a support surface; it does not guarantee correct form or remove the need to control the dumbbell.
Waxman Adjustable Weight Bench is one example of a bench listed for strength training. Its product page displayed $269.00 USD on October 27, 2026; price and availability may change. The product description has an inconsistency in how it describes back positions, so this article does not rely on a position count or angle.

Waxman Adjustable Weight Bench
$269.00 USD (checked October 27, 2026). The listing describes an adjustable bench with multiple cushions. The exact position count is omitted because the page title and description differ.
Use the manual for model-specific setup and limits. The bench is an example for readers comparing a support surface; this article does not claim it was tested for this exercise.
Price and availability may change; see product page.
Key takeaway
Set the bench on a level, clear surface; support yourself with one hand and the same-side knee; keep the other foot planted; and move a manageable dumbbell without twisting. Stop if the bench shifts, the load is hard to control, or the movement hurts. An AI-generated illustration accompanies this article as a generic visual aid; it is not a product photo or a demonstration of a specific model.
Sources: ACE Fitness: Single-arm Row; Mayo Clinic: Weight training technique; Waxman product listing.
Leave a Reply